The Irresistible Allure of No-Bake Caramel DeLite Oat Cups
Few treats evoke as much nostalgic delight as the classic Girl Scout Caramel DeLite cookie. That perfect harmony of crunchy shortbread, chewy caramel, toasted coconut, and a rich chocolate drizzle is truly iconic. But what if you could capture that magic in a healthier, easier, and completely no-bake form? Enter the extraordinary world of Caramel DeLite Oat Cups – the viral sensation that’s quickly becoming a beloved staple for dessert lovers everywhere.
These delightful oat cups are more than just a passing trend; they're a testament to how simple ingredients and smart techniques can create a truly indulgent experience without ever turning on your oven. Perfect for busy weeknights, effortless entertaining, or simply satisfying that sweet craving, mastering these no-bake wonders is easier than you think. This comprehensive guide will walk you through essential tips and tricks, ensuring every batch of your caramel delite oat cups is nothing short of perfection.
The Magic Behind No-Bake Caramel DeLite Oat Cups
The core appeal of quick & easy caramel delite oat cups lies in their simplicity and the ingenious way they layer textures and flavors. Unlike traditional baking, which often involves precise measurements and temperature control, these treats come together with minimal fuss, making them accessible to even novice cooks. Imagine the decadent taste of your favorite cookie, transformed into a convenient, grab-and-go cup, bursting with flavour in every bite.
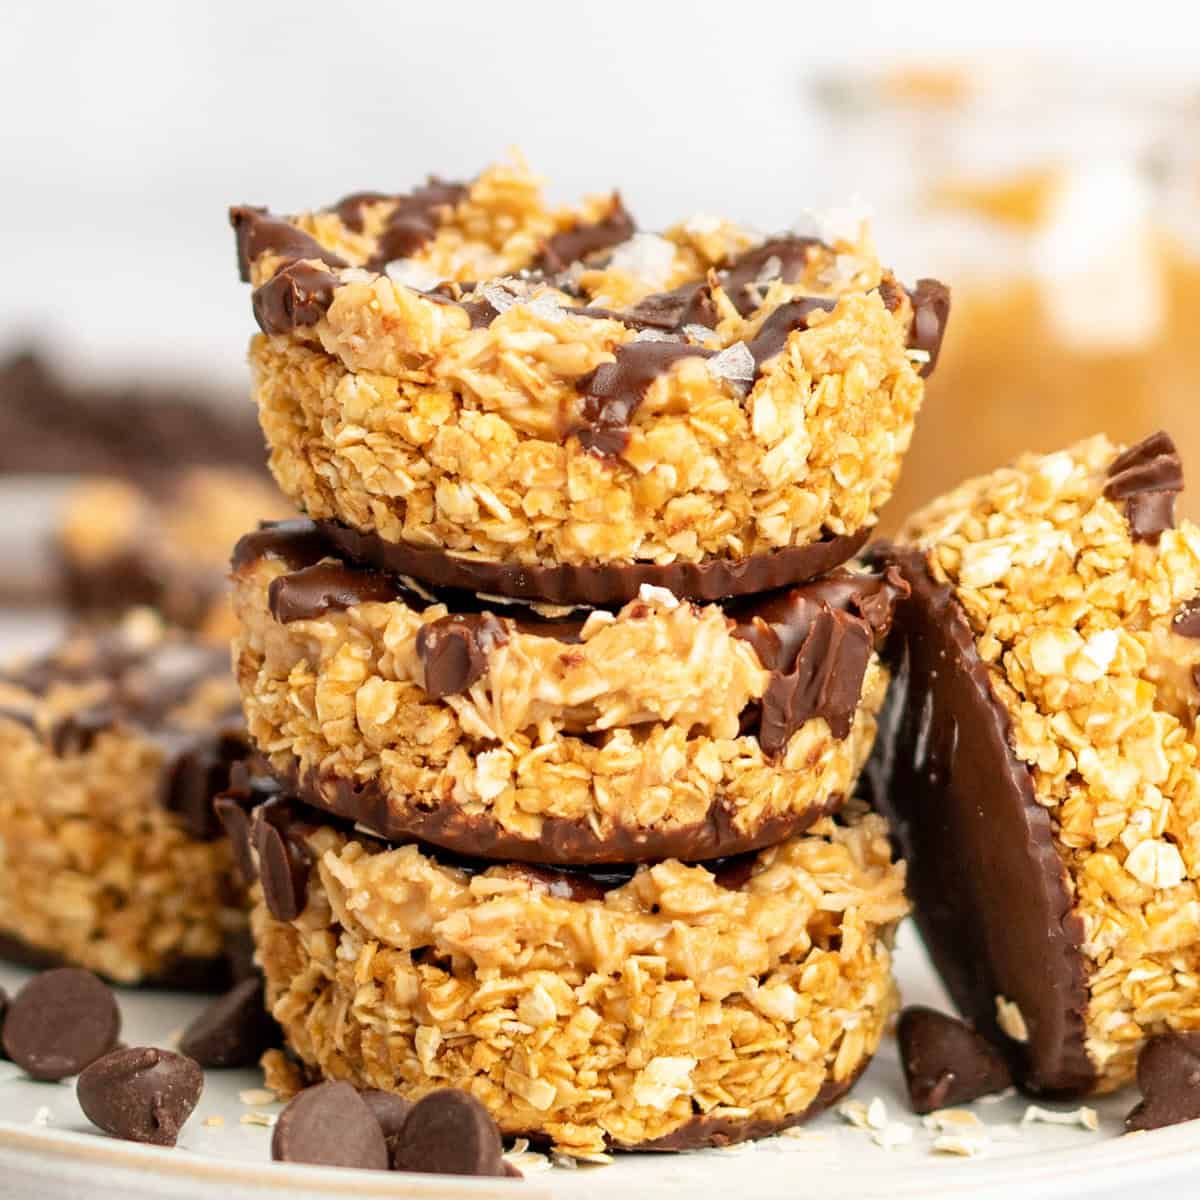
The concept is brilliant: a sturdy chocolate shell encasing a rich, buttery caramel oat filling, often topped with another layer of chocolate and a sprinkle of something special. This multi-layered approach ensures that each spoonful delivers that signature "zing" reminiscent of the beloved cookie. Beyond their ease, these no-bake caramel delite oat cups offer a satisfying chewiness and an incredible depth of flavor that belies their humble origins. They're a fantastic way to enjoy a comforting dessert without the guilt or the extensive prep time.
Crafting the Perfect Chocolate Foundation
Every magnificent building needs a strong foundation, and your caramel delite oat cups are no different. The chocolate cup serves as both the structural integrity and a crucial flavor component. Getting this layer right is key to a successful, mess-free experience. Most recipes call for a simple combination of semisweet chocolate chips and a touch of coconut oil, along with a pinch of sea salt for that delightful sweet-and-salty contrast.
To begin, you'll want to line a 12-cup cupcake pan, ideally with reusable silicone liners. These make for easy removal and cleanup. Melt your chocolate chips and coconut oil together in a microwave-safe bowl, heating in short 30-second intervals and stirring thoroughly between each to prevent burning. The coconut oil isn't just for melting; it helps to create a smoother, more fluid chocolate that's easier to spread and sets with a beautiful snap. Once melted and glossy, use a small offset spatula or the back of a spoon to spread a thin, even layer of chocolate onto the bottom of each liner and about 1/2 an inch up the sides. This creates a sturdy 'wall' for your caramel filling. Don't be shy with the sea salt at this stage; a light sprinkle on the chocolate base enhances the overall flavor profile significantly. Immediately place the pan in the fridge to allow the chocolate to set completely while you prepare the filling. For those who prefer a sweeter, creamier note, feel free to substitute the semisweet chocolate with milk chocolate on a 1:1 basis – the beauty of these caramel delite oat cups is their adaptability!
Whipping Up the Dreamy Caramel Oat Filling
The heart of your caramel delite oat cups truly lies in the luscious, golden caramel oat filling. This chewy, decadent layer provides the signature texture and taste that makes these treats so irresistible. The core ingredients for this magic typically include sweetened condensed milk, light brown sugar, unsalted butter, a hint of vanilla extract, a pinch of salt, and crucially, quick oats.
Combine the sweetened condensed milk, brown sugar, butter, and salt in a saucepan. Bring this mixture to a medium-low heat, stirring continuously. This constant stirring is vital to prevent the sugar from scorching and sticking to the bottom of the pan. As the mixture heats, you'll notice it start to bubble slightly. At this point, reduce the heat to low and continue to stir diligently for about 8 minutes. During this time, the caramel will gradually thicken and develop its rich, golden hue. A pro tip for checking consistency: spoon a small amount into a bowl of ice water. If it firms up quickly and can be rolled into a soft ball, it's ready. Remove from heat and stir in the vanilla extract, which adds an essential depth of flavor that elevates the caramel from merely sweet to truly sublime.
Now, for the "oat" part of your caramel delite oat cups. Once your caramel has cooked, fold in the quick oats. This is where a critical distinction comes into play: you absolutely must use quick oats, not rolled oats. Rolled oats are too large and won't absorb the caramel mixture properly, resulting in a crumbly, unheld-together filling. Quick oats, being more finely cut, integrate seamlessly, providing that wonderful chewy texture and helping the filling hold its shape. As the mixture cools slightly, it will continue to thicken, creating the perfect consistency for scooping into your chilled chocolate cups.
Assembling Your DeLiteful Oat Cups
With your chocolate foundations set and your caramel oat filling perfectly prepared, it’s time for the exciting part: assembly! This is where the four distinct layers of your caramel delite oat cups come together to create a symphony of flavor and texture.
- The Chocolate Base: You've already done this! The chilled chocolate layer forms the sturdy bottom and sides of your cup.
- The Caramel Oat Filling: Carefully spoon your cooled caramel oat mixture into each chocolate-lined cup. Gently press it down to form an even layer, leaving a small gap at the top for the final chocolate layer.
- The Top Chocolate Layer: Melt another batch of chocolate chips (and coconut oil, if using) just as you did for the base. Pour a thin layer over the caramel oat filling, sealing it in. For an authentic touch, you could even make a delicate chocolate drizzle pattern across the top.
- The Finishing Touches: While the top chocolate layer is still wet, sprinkle generously with a little more sea salt to enhance the sweet-and-salty dynamic. For true Caramel DeLite authenticity, a light dusting of toasted coconut flakes is an absolute game-changer, adding another layer of texture and tropical sweetness.
Once assembled, place the entire muffin tin back into the refrigerator or, even better, the freezer, to allow all the layers to set firmly. Remember, if you're aiming for bite-sized delights, using a mini-sized muffin tin instead of a standard one will yield more total caramel delite oat cups, perfect for sharing (or not!).
Critical Tips for Caramel DeLite Oat Cup Success
While these no-bake caramel delite oat cups are remarkably forgiving, there are a few non-negotiable tips that will ensure your success and elevate your treats from good to absolutely phenomenal.
- The Oats Matter: As emphasized earlier, only use quick oats. Rolled oats simply won't work in this recipe as they lack the finer texture needed to bind with the caramel and maintain the cup's structure.
- Storage is Key: These are not countertop desserts! To maintain their form and texture, your caramel delite oat cups must be stored in the freezer. If left at room temperature, especially in warmer environments, they will soften and lose their shape.
- Patience Before Perfection: While storing them in the freezer is essential, eating them straight out can be challenging due to their firmness. Allow your caramel delite oat cups to thaw at room temperature for about 20 minutes before serving. This brief thaw period will soften them just enough to be perfectly chewy and enjoyable without being too hard to bite into.
- Embrace Customization: Don't be afraid to experiment! Beyond milk chocolate, consider adding a tiny splash of rum extract or a pinch of cinnamon to your caramel for added complexity. A sprinkle of chopped nuts or a different type of flake (like white chocolate curls) can also add unique twists to your caramel delite oat cups.
- Liners are Your Friend: While not strictly "critical," using silicone cupcake liners or good quality paper liners sprayed lightly with cooking spray will make removing your finished oat cups much easier and prevent any sticking.
Beyond the Recipe: Why These Oat Cups Are a Must-Try
The beauty of these caramel delite oat cups extends far beyond their delicious taste and ease of preparation. They represent a smart, adaptable dessert solution for almost any occasion. Planning a party? Whip up a batch (or two!) of mini caramel delite oat cups for adorable, portion-controlled treats that will impress your guests. Looking for a satisfying, healthier alternative to traditional baked goods for meal prepping your snacks? These fit the bill perfectly, offering fiber-rich oats and a decadent flavor without the heavy feeling. They’re also fantastic for satisfying those sudden sweet cravings without a lot of fuss. Their nostalgic flavor profile, combined with the convenience of a no-bake recipe, makes them a go-to for families, busy individuals, and anyone who appreciates a delightful dessert that delivers big on flavor and ease.
Whether you're a seasoned baker or a complete kitchen novice, these Caramel DeLite Oat Cups are a truly rewarding project. They offer a chance to create something genuinely delicious and impressive with minimal effort, proving that sometimes the best desserts don't require an oven at all.
